

Write a knowledge document in the console
Summary
Section titled “Summary”You write a knowledge document by hand in the KonversAI console. Select Knowledge in the left sidebar, then select Documents. The screen carries the heading Knowledge Base and the line Manage documents for semantic search and AI-powered conversations. Select New Document to open the New Document screen. A document has a Document Title, a Category, a Status and the Content. The assistant answers customers from a document only when its Status is Published.
Who can do this
Section titled “Who can do this”A tenant administrator, or any team member whose role has the View knowledge base and Modify knowledge base permissions. An administrator sets these on Settings > Users & permissions in the KonversAI console. If you do not see Knowledge > Documents in the left sidebar, you do not have this access. Ask an administrator to change your role.
Before you start
Section titled “Before you start”You write the document on the New Document screen in the KonversAI console. Open it from Knowledge > Documents in the left sidebar, where the screen heading is Knowledge Base.
Decide the subject first. One document covers one subject. The assistant finds a short, single-subject document more easily than a long mixed one. Split a long manual into one document for each question.
Write the answer in the words your customers use. The Content field is a Markdown editor with a toolbar for bold text, lists, headings and links. KonversAI stores your text as Markdown.
Two other screens add knowledge from a source you already have. To add a file, read Upload a file to the knowledge base. To add your website, read Connect your website as a knowledge source.
Write a new document
Section titled “Write a new document”-
Select Knowledge in the left sidebar of the KonversAI console, then select Documents. The screen opens with the heading Knowledge Base.
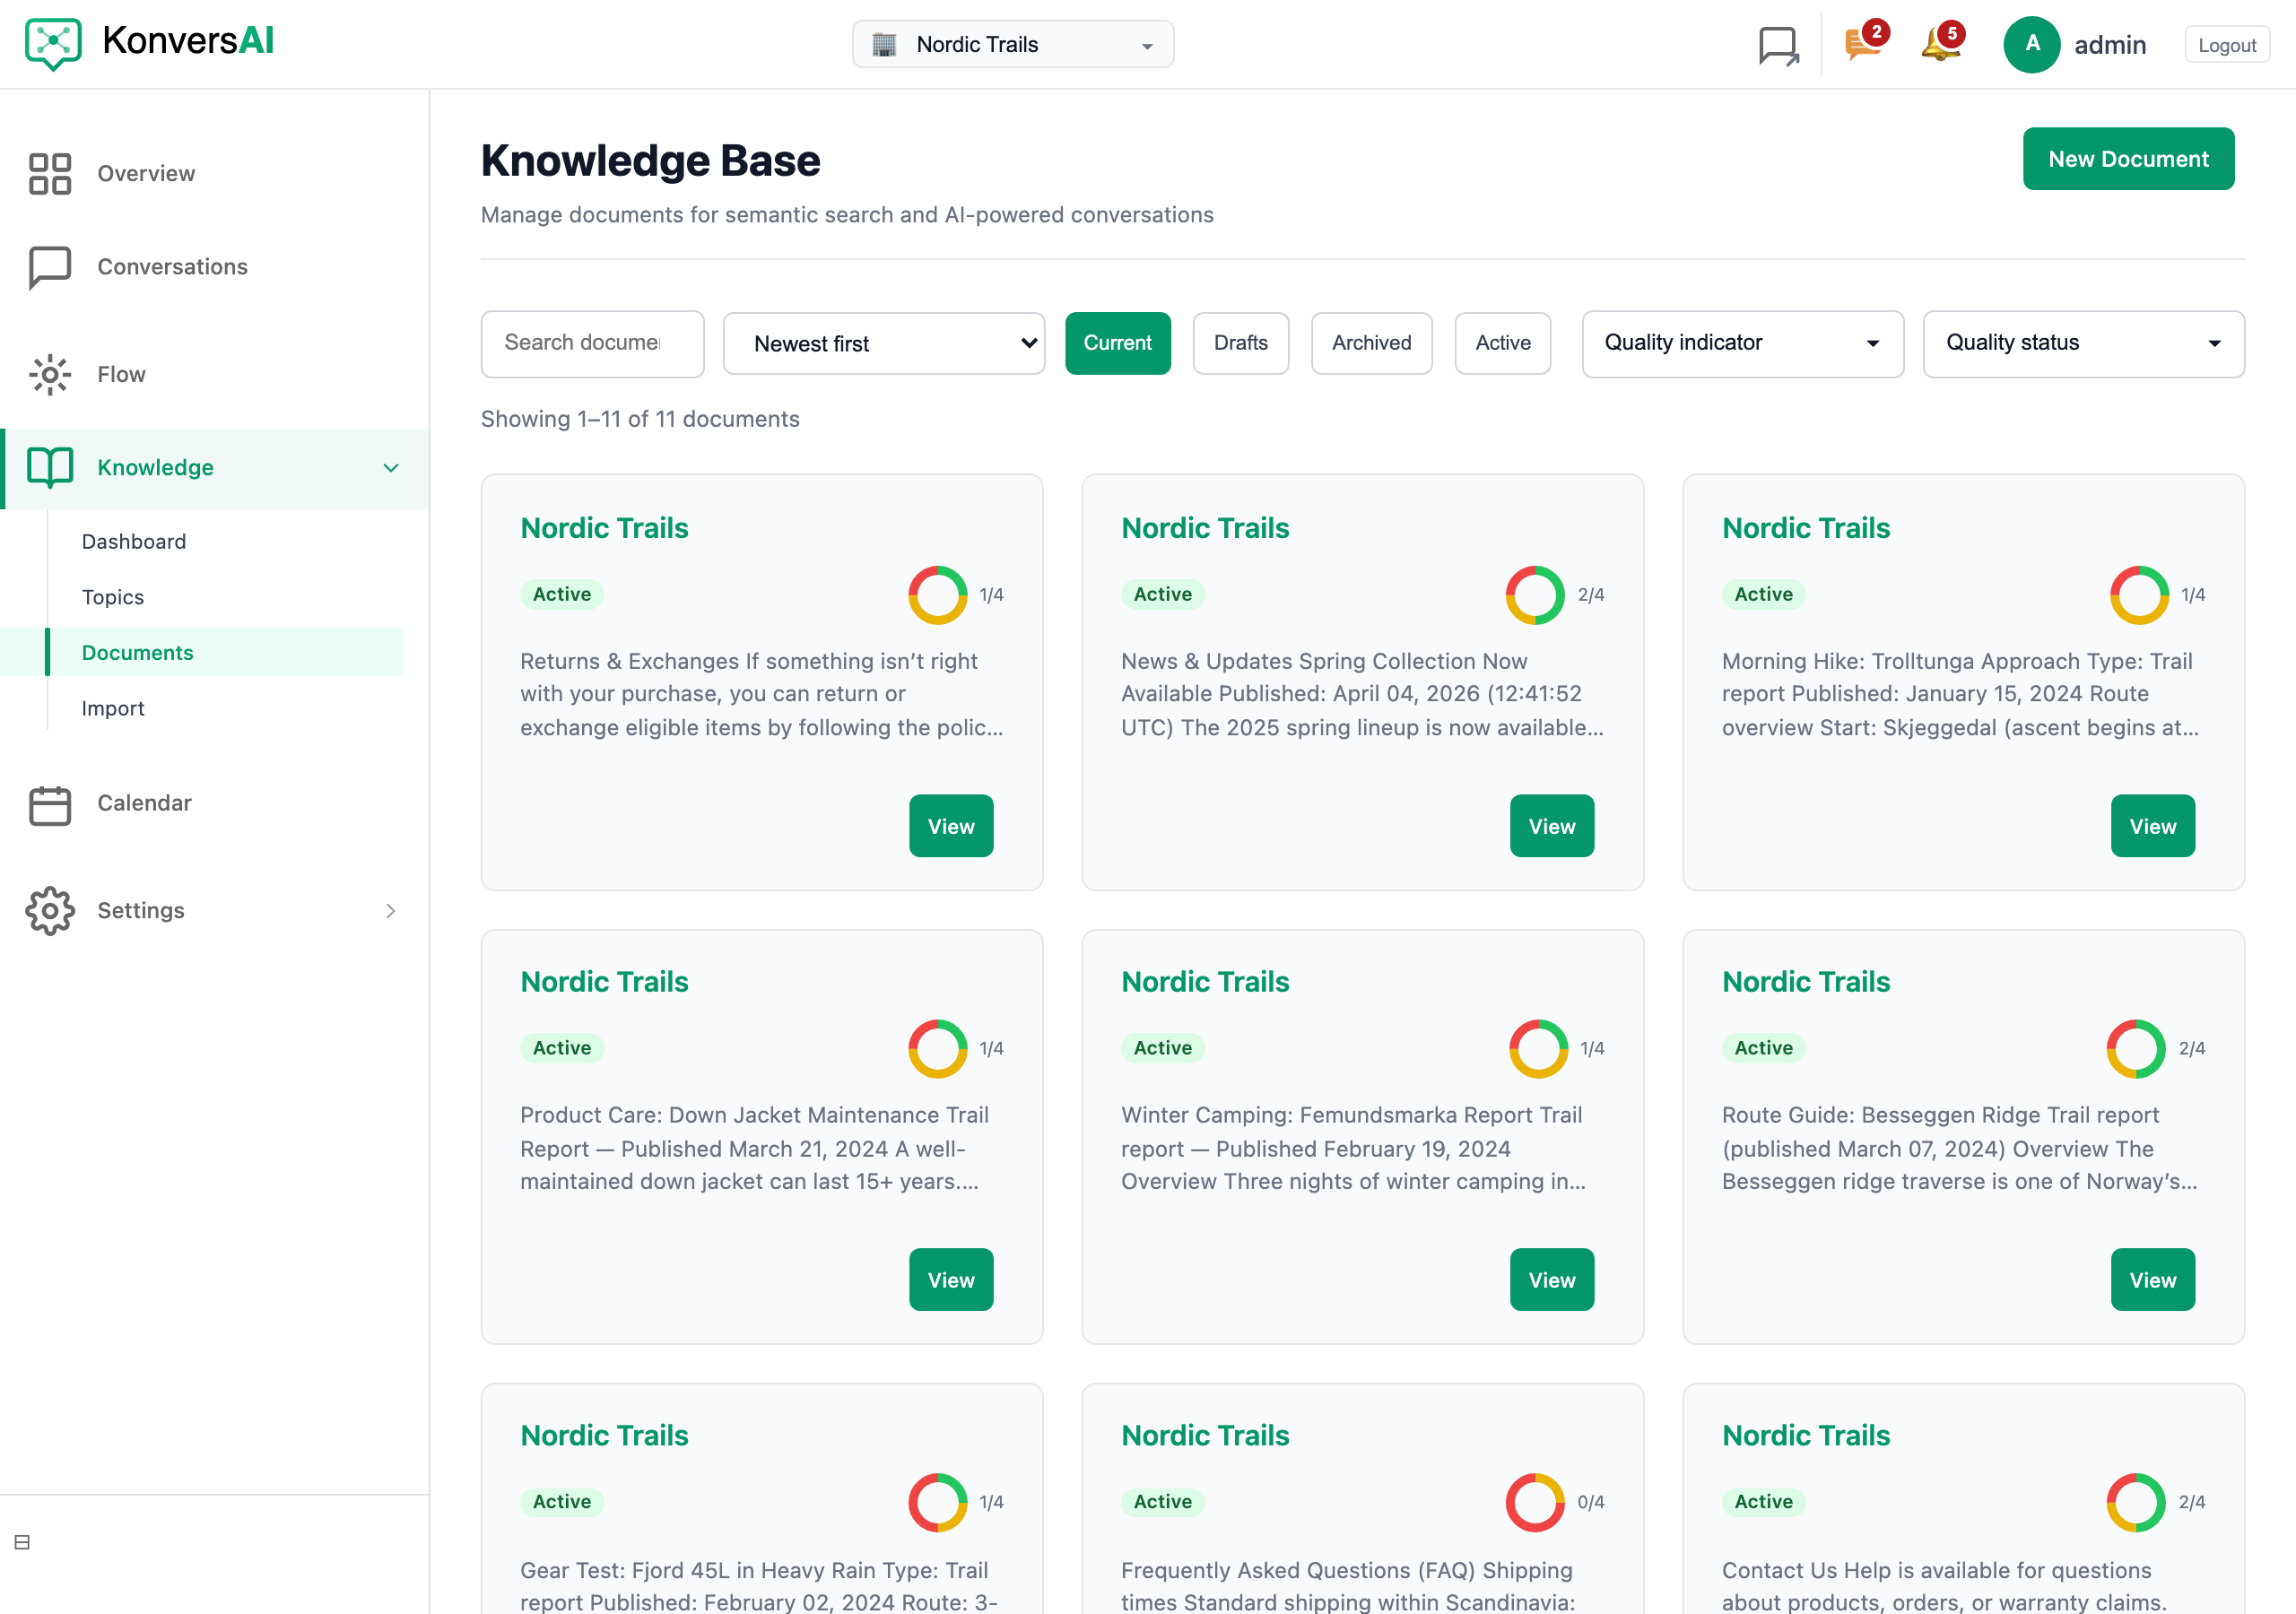
Every document KonversAI made from your sources appears here.
-
Select New Document. The New Document screen opens.
-
Type the subject in Document Title. This field is mandatory. The title holds a maximum of 255 characters.
-
Choose a category in Category. The default is No Category. The list shows the categories your tenant already has. See Sort documents into categories.
-
Choose the status in Status. The choices are Published, Draft and Archived. The default is Published.
-
Write the answer in Content. This field is mandatory. Use the toolbar for headings, lists and links.
-
Select Create Document. KonversAI saves the document and returns to the Knowledge Base screen. To leave the screen and save nothing, select Cancel.
KonversAI makes the chunks and the embedding in the background, and runs the quality checks. You do not need to train the assistant. A Published document reaches the assistant in the next conversation.
If the screen shows Failed to save document. Please check required fields., KonversAI could not save the document. The console shows this same text for every save failure. An empty field is not the cause: the browser blocks Create Document while Document Title or Content is empty. A lost connection, and a knowledge base that reached the capacity of your plan, are the common causes. Select Create Document again. Contact KonversAI support if the message stays.
Change a document you already have
Section titled “Change a document you already have”- Select Knowledge in the left sidebar of the KonversAI console, then select Documents. The screen opens with the heading Knowledge Base.
- Find the document. Type in Search documents…, or filter with Current, Drafts, Archived or Active.
- Select the document title. The Edit Document screen opens.
- Change Document Title, Category, Status or Content.
- Select Save Changes.
At the top of the Edit Document screen, the Quality panel shows the automatic checks KonversAI ran on the text. When all checks pass it collapses to a single “Looks good” line. When a check finds an issue it expands with a description and action buttons. Select Jump to location to scroll to that spot in the Konvers article. Comments sit in the Konvers article. They do not sit in Extracted Content or Raw HTML contents. If that sentence is not in the Konvers article, only the panel finding remains. Select Jump to content to scroll the editor into view when the finding has no spot in the article. Select Open to open a conflicting document. Select Dismiss on any finding to mark it as a false positive. The right column holds the Document Information card: topic, created date, updated date, embedding, number of chunks and status. Below the form, expand Content Chunks to read the exact parts the assistant searches.
Delete a document
Section titled “Delete a document”- Select Knowledge in the left sidebar of the KonversAI console, then select Documents. The screen opens with the heading Knowledge Base.
- Select the document title. The Edit Document screen opens.
- Select Delete Document at the top right of the Edit Document screen.
- Your browser asks Are you sure you want to delete this document?. Confirm the question.
KonversAI removes the document and its chunks, and returns to the Knowledge Base screen. A deletion is final. To hide a document and keep the text, open it and set Status to Archived instead, then select Save Changes.
Paste text and let KonversAI write the drafts
Section titled “Paste text and let KonversAI write the drafts”- Select Knowledge in the left sidebar of the KonversAI console, then select Import. The Imports screen opens.
- Select + Import. The Start import screen opens with three cards: Website, File upload and Text.
- Select the Text card. The card says Paste text content like FAQs, manuals, or documentation. A text box opens under the card.
- Paste your text into the text box.
- Select Create text import. KonversAI opens the import screen.
- Wait. The screen shows Processing your import… and the line We’re analyzing your text and generating documents. This may take a moment.
- Read the new documents under Drafts to Review. The section says These documents need your review before they go live.
- Open each draft, correct the text, set Status to Published, then select Save Changes. To publish every draft at once, select Publish All at the top of the import screen. The button shows the number of drafts in brackets.
What is the difference between pasting text and writing a document by hand?
Section titled “What is the difference between pasting text and writing a document by hand?”Both add knowledge to the KonversAI console, and both make documents in Knowledge > Documents. They differ in who writes the document.
When you select New Document on the Knowledge Base screen, you write one document yourself. You choose the title, the category, the status and every word of the content. KonversAI changes nothing.
When you paste text under Knowledge > Import > + Import > the Text card, KonversAI reads your text and splits it into several documents. KonversAI writes a title for each one, extracts the matching content, and saves each document with the status Draft. KonversAI also picks a category for each draft from the categories you already have. You then read each draft and publish it.
Use New Document for one exact answer you already know. Use the Text card for a long block of existing material, such as a whole FAQ page.
What does “published” mean for the assistant?
Section titled “What does “published” mean for the assistant?”Published is one of three values in the Status field of a knowledge document in the KonversAI console. The other two are Draft and Archived. The assistant searches documents with the status Published only. A Draft document and an Archived document never reach a customer.
Set Status to Draft while you write or check the text. Set it to Published when the answer is correct. KonversAI makes the chunks and the embedding in the background, so the assistant uses the new text in the next conversation.
The Knowledge Base screen under Knowledge > Documents shows a badge on each document card. A published document shows Active. A draft shows Draft. An archived document shows Archived.
Which fields does a knowledge document have?
Section titled “Which fields does a knowledge document have?”A knowledge document in the KonversAI console has four fields you fill in. Open Knowledge > Documents in the left sidebar, then select New Document or an existing document.
- Document Title — mandatory, a maximum of 255 characters. KonversAI searches the title together with the content, so write a clear title.
- Category — optional. The default is No Category. A category groups documents for the people who manage the knowledge base.
- Status — Published, Draft or Archived. The default is Published.
- Content — mandatory. This is the answer text, in a Markdown editor.
At the top of the Edit Document screen the Quality panel shows any automatic checks that found issues. When everything is in order it shows “Looks good”. Select Jump to location to scroll to that spot in the Konvers article. Select Jump to content to scroll the editor when the finding has no spot in the article. The right column adds read-only information in the Document Information card: the topic, the created date, the updated date, the embedding, the chunk count and the status.
How do I delete a knowledge document?
Section titled “How do I delete a knowledge document?”Select Knowledge in the left sidebar of the KonversAI console, then select Documents. The screen heading is Knowledge Base. Select the title of the document. The Edit Document screen opens. Select Delete Document at the top right. Your browser asks Are you sure you want to delete this document?. Confirm the question.
KonversAI removes the document and its chunks. A deletion is final, and no undo exists. To take a document away from the assistant and keep the text, set Status to Archived and select Save Changes instead.
I saved my document but the assistant still gives the old answer. Why?
Section titled “I saved my document but the assistant still gives the old answer. Why?”Three causes are common in the KonversAI console.
First, check the Status field of the document under Knowledge > Documents. The assistant reads documents with the status Published only.
Second, another document may still hold the old text. Open Knowledge > Documents and search for the old wording. Correct or delete the second document.
Third, KonversAI makes the chunks and the embedding in a background task. This takes seconds, not hours. Open the document and read the Document Information card. The Embedding: row shows a tick and the word Yes when the new text is ready.
To find which document the assistant used for a wrong answer, read Find out why an answer was wrong.
The Knowledge Base screen says “No documents found”. What do I do?
Section titled “The Knowledge Base screen says “No documents found”. What do I do?”No documents found with the line Get started by creating a new document. means your tenant has no document that matches the current filter. You see this on the Knowledge Base screen under Knowledge > Documents in the KonversAI console.
Check the filter buttons first: Current, Drafts, Archived and Active. Drafts hides every published document, so an empty result there is normal. Clear the text in Search documents… as well.
If your tenant really has no documents, select New Document and write the first one. Or select Knowledge > Import to add a file or a website.
A draft from a text import contains “CLARIFICATION NEEDED”. What is that?
Section titled “A draft from a text import contains “CLARIFICATION NEEDED”. What is that?”KonversAI writes the marker *** CLARIFICATION NEEDED: ... *** into a draft
document when your pasted text does not answer the question fully. You paste
text under Knowledge > Import > + Import > the Text card in the
console.
The marker is a note to you, not to the customer. Open the draft under Drafts to Review on the import screen. Replace the whole marker line with the correct answer. Then set Status to Published and select Save Changes.
Never publish a draft that still holds the marker. The assistant would read the marker text and repeat it to a customer.
Can I write a document in Markdown?
Section titled “Can I write a document in Markdown?”Yes. The Content field on the New Document and Edit Document screens in the KonversAI console is a Markdown editor. The toolbar gives you bold text, italic text, lists, headings and links. KonversAI stores your text as Markdown and the assistant reads it as Markdown.
Use headings to separate the subjects inside one document. KonversAI splits a document into chunks and searches the chunks one at a time. Clear headings and short paragraphs make each chunk useful on its own. Expand Content Chunks on the Edit Document screen to read the chunks KonversAI made.
Last reviewed . Tell us when a step no longer matches the product.