

Set the assistant tone and scope
Summary
Section titled “Summary”You set the tone and the scope of your assistant on the Assistant preferences screen in the KonversAI console. Select Settings in the left sidebar, then select AI preferences. The screen heading is Assistant preferences. Every setting on this screen is tenant-wide: it applies to every widget, every entry point and every channel in your tenant. The screen holds seven settings and one read-only summary. The help text at the top of the card says: These settings apply tenant-wide and are used when building assistant prompts (conversation scope and tone). They help keep conversations on-topic and set the desired tone.
Who can do this
Section titled “Who can do this”A team member with the View tenant settings permission opens the Assistant preferences screen in the KonversAI console. A team member with the Modify tenant settings permission saves a change. A Tenant Admin holds both permissions, always. Without View tenant settings, the item AI preferences does not appear under Settings in the left sidebar. Ask a Tenant Admin to grant the permission on the User permissions screen.
Before you start
Section titled “Before you start”Sign in to the KonversAI console and select your tenant. Select Settings in the left sidebar, then select AI preferences. The screen heading is Assistant preferences.
This screen is not behind a feature flag. Every tenant has it.
Decide the topics your assistant must cover, and the topics it must refuse. You type this text yourself. KonversAI copies your text into the assistant prompt word for word.
These settings are tenant-wide. A change here changes every conversation in the tenant, on every channel. There is no per-widget version of these settings.
Conversation scope, Tone of voice and No answer message use a rich text box. The box stores Markdown. The small toolbar above the box gives you bold, italic, lists and links.
-
Select Settings in the left sidebar of the KonversAI console, then select AI preferences. The screen opens with the heading Assistant preferences.
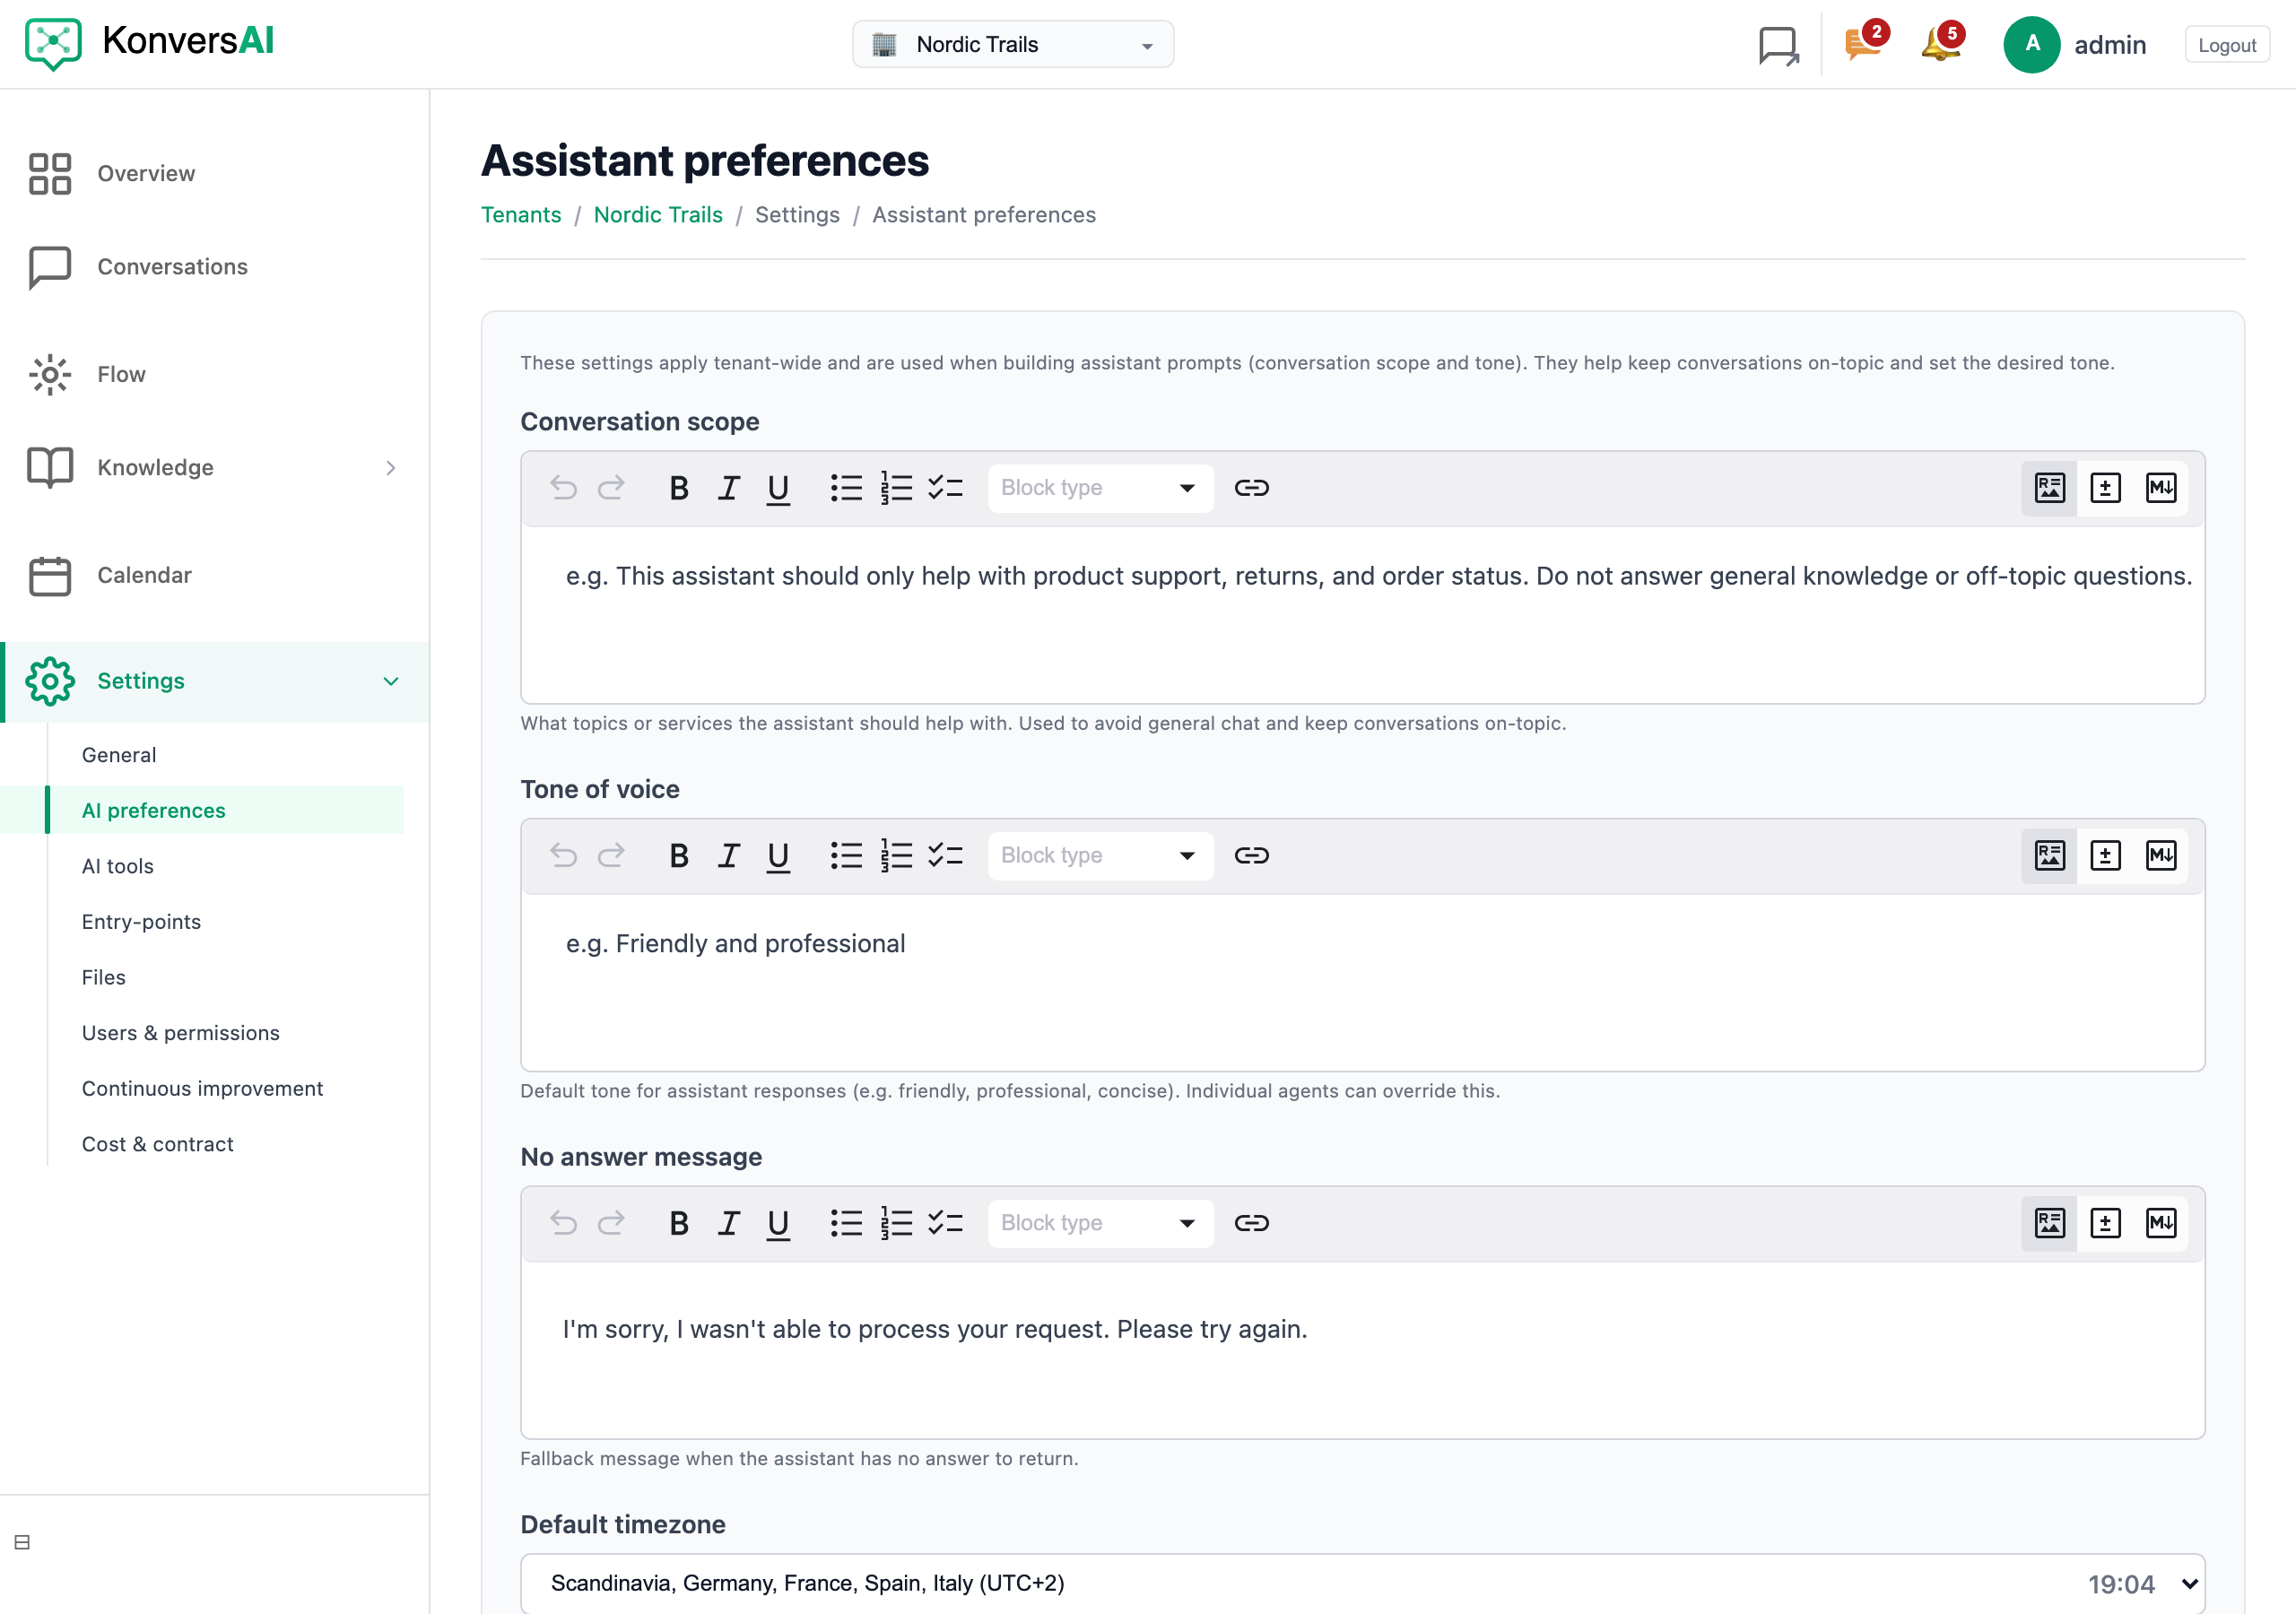
Assistant preferences. These settings apply to the whole tenant.
-
Type the topics for your assistant in Conversation scope. The help text says: What topics or services the assistant should help with. Used to avoid general chat and keep conversations on-topic. KonversAI puts this text in the tenant context of the assistant prompt. KonversAI also uses this text to decide that a question is off-topic.
-
Type the tone for your assistant in Tone of voice. The help text says: Default tone for assistant responses (e.g. friendly, professional, concise). Individual agents can override this. Write a short instruction, such as “Friendly and professional”.
-
Type the fallback text in No answer message. The help text says: Fallback message when the assistant has no answer to return. KonversAI sends this text to the customer when the assistant produces no reply at all. Leave the field empty to use the built-in text: I’m sorry, I wasn’t able to process your request. Please try again.
-
Select your business timezone in Default timezone. The help text says: Used for calendar bookings, opening hours, and tenant-local assistant time. The default is
Europe/Oslo. KonversAI accepts IANA timezone names only. A bad value gets the error Enter a valid IANA timezone name (e.g. Europe/Oslo). -
Select the fallback language in Default language. The list shows English, Norsk bokmål, Svenska and Danish, under the placeholder Select a language. The help text says: The assistant will try to answer in the same language as the user’s question. This setting guides the assistant when the language cannot be detected. ISO 639-1 codes are accepted (e.g. en, no, sv, da).
-
Type your calling code in Default country code for phone numbers. The help text says: ITU-T E.164 country calling code, prefixed with + (e.g. +47 for Norway, +1 for the US/Canada). Used when an end-user provides a local-format phone number. The placeholder shows
+47. KonversAI adds the+for you when you leave it out. -
Select the checkbox under Require email verification before handover to ask for a verified email first. The checkbox text says: When enabled, the agent will ask the user to verify their email before notifying the team on Slack or transferring to a human. The note under the checkbox says: Requires email verification to be enabled on the assistant agent.
-
Read Knowledge base summary. This box is read-only. The help text says: Auto-generated summary of what the knowledge base covers (from published document titles). Used in agent prompts to keep conversations on-topic. Read-only. Select Refresh now to rebuild the summary. The button changes to Refreshing… while KonversAI queues the job.
-
Select Save preferences. To leave the screen and change nothing, select Cancel.
KonversAI applies the new preferences to the next message in every conversation in the tenant. You do not restart or republish anything.
What is the difference between Conversation scope and Tone of voice?
Section titled “What is the difference between Conversation scope and Tone of voice?”Conversation scope and Tone of voice are two fields on the Assistant preferences screen in the KonversAI console, under Settings > AI preferences. Conversation scope says what the assistant talks about. Write the topics, the products and the services it must cover, and the subjects it must refuse. KonversAI also uses this text to decide that a customer question is off-topic. Tone of voice says how the assistant writes. Write a short instruction, such as “Friendly and professional” or “Short and direct”. Both fields go into the assistant prompt as tenant context.
Do these settings apply to one widget only?
Section titled “Do these settings apply to one widget only?”No. Every setting on the Assistant preferences screen in the KonversAI console is tenant-wide. Select Settings in the left sidebar, then select AI preferences, to reach the screen. Conversation scope, Tone of voice, No answer message, Default timezone, Default language, Default country code for phone numbers and Require email verification before handover apply to every widget, every entry point and every channel in the tenant. There is no per-widget version of these fields. To change the look and the greeting of one widget, use Settings > Entry-points instead.
Why does my assistant answer in the wrong language?
Section titled “Why does my assistant answer in the wrong language?”Default language on the Assistant preferences screen in the KonversAI console is a fallback, not a lock. Select Settings in the left sidebar, then select AI preferences, to reach it. The assistant reads the language of the customer message and answers in that language. It uses Default language only when the customer language is unclear, for example on a very short or mixed message. The list holds English, Norsk bokmål, Svenska and Danish. Leave Default language empty, and the assistant follows the last clear message from the customer instead.
When does the customer see the No answer message?
Section titled “When does the customer see the No answer message?”No answer message on the Assistant preferences screen in the KonversAI console is the last resort. Select Settings in the left sidebar, then select AI preferences, to set it. KonversAI sends this text when the assistant produces no reply text and no other action for a customer message. It is not the message for “I could not find this in the knowledge base” — the assistant writes that answer itself. Leave the field empty to use the built-in text: I’m sorry, I wasn’t able to process your request. Please try again.
The Knowledge base summary is empty. How do I fill it?
Section titled “The Knowledge base summary is empty. How do I fill it?”Knowledge base summary on the Assistant preferences screen in the KonversAI console is read-only, and KonversAI writes it for you. Select Settings in the left sidebar, then select AI preferences, to see it. The placeholder reads: No summary yet. Use “Refresh now” to generate from published knowledge base documents. KonversAI builds the summary from the titles of your published documents only. An empty knowledge base gives an empty summary. Publish some documents first, then select Refresh now. KonversAI queues the job, so reload the screen after a moment to read the new text. KonversAI also rebuilds the summary every night, and after an import completes.
What does Default timezone change for my customers?
Section titled “What does Default timezone change for my customers?”Default timezone on the Assistant preferences screen in the KonversAI
console sets the local business time of your tenant. Select Settings in the
left sidebar, then select AI preferences, to set it. KonversAI uses it for
calendar bookings, for opening hours, and for the “today” and “now” that the
assistant sees. A customer who asks for a booking “tomorrow morning” gets the
slots of your business day, not of the server. The default is Europe/Oslo.
Type an IANA timezone name, such as Europe/Stockholm or America/New_York.
I selected Require email verification before handover, but nothing changed.
Section titled “I selected Require email verification before handover, but nothing changed.”Require email verification before handover on the Assistant preferences screen in the KonversAI console needs a second setting. Select Settings in the left sidebar, then select AI preferences, to find the checkbox. The note under the checkbox states the condition: Requires email verification to be enabled on the assistant agent. Without an email verification tool on the assistant, the assistant has no way to ask for the code, so it hands the conversation over as before. Add the Email Verification tool under Settings > AI tools, then test the handover again.
What does Default country code for phone numbers do?
Section titled “What does Default country code for phone numbers do?”Default country code for phone numbers on the Assistant preferences
screen in the KonversAI console repairs local phone numbers. Select Settings
in the left sidebar, then select AI preferences, to set it. A customer often
types a number with no international prefix, such as 91234567. KonversAI adds
your calling code in front of it, so phone verification and the contact record
get a full E.164 number. Type the code with a leading +, such as +47 for
Norway or +1 for the US and Canada. KonversAI adds the + when you leave it
out.
Last reviewed . Tell us when a step no longer matches the product.